Definition of Inventory
Inventory consists of the goods that a business holds for the purpose of selling them. Managing inventory is a complex process, but the basics are essentially the same regardless of an organization’s size or type. The ultimate goal is to have the inventory in line with the geographic location and demand of a product.
Data grid Inventory Items
Get an overview of all Inventory Items in the system.
- Click on Products in the menu and then go to → Inventory / Inventory
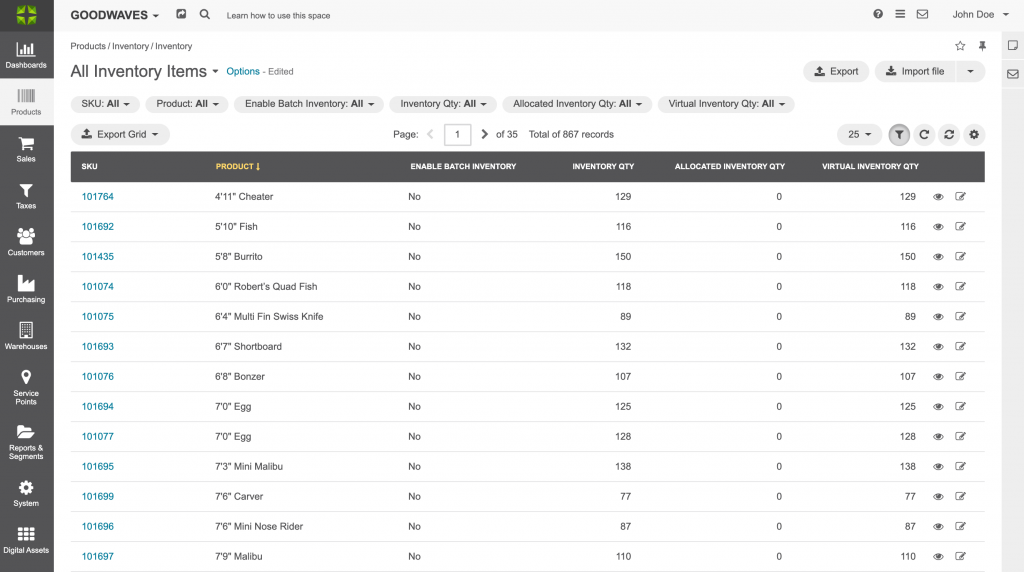
- SKU: Stock Keeping Unit: Unique product code
- Product: Name of the product
- Enable Batch Inventory: Whether batch management is activated. Learn more about Inventory Batches on our detailed Inventory Batches pages here.
- Inventory Quantity: Shows the amount of physically present inventory of a product
- Allocated Inventory: Shows the amount of allocated inventory of a product. This is inventory that is assigned to orders and therefore can’t be sold anymore
- Virtual Inventory: Shows the amount of inventory that is available for sale. Virtual inventory is Inventory Quantity minus Allocated Inventory
Product inventory overview
An overview of product inventory.
- Navigate to Products → Inventory → Inventory → Click on a product. By clicking on a product in the overview, a product inventory ‘view’ page will open.

General Information
Product Information:
- Name: Name of the product
- SKU: Stock Keeping Unit: Unique product code
- Product Status: If the product is Enabled or Disabled
Inventory Batch:
- Enable Batch Inventory: Whether inventory batches are enabled
Inventory Level Totals:
- Inventory Qty: Shows the amount of physically present inventory of a product
- Allocated Inventory Qty: Shows the amount of allocated inventory of a product. This is inventory that is assigned to orders and therefore can’t be sold anymore
- Virtual Inventory Qty: Shows the amount of inventory that is available for sale. Virtual inventory is Inventory Quantity minus Allocated Inventory
Inventory Levels
- Warehouse: The warehouse where the product inventory is located
- Pick Location: Where the inventory item is located
- Warehouse Type: Type of the Warehouse
- Inventory qty: Shows the amount of physically present inventory of a product
- Allocated qty: Shows the amount of allocated inventory of a product. This is inventory that is assigned to orders and therefore can’t be sold anymore
- Virtual qty: Shows the amount of inventory that is available for sale. Virtual inventory is Inventory Quantity minus Allocated Inventory
- Created at: The date on which the inventory level was assigned to the product
- Updated at: The date on which the last updates have been made to the inventory level
Inventory Movements
- Graph: Shows inventory movements over the last 7 days
- Inventory Alteration: Alterations to the quantity of the product in the inventory
- Allocated Inventory Alteration: Alterations to the quantity of product allocation in the inventory
- Warehouse: the place where alteration took place
- Trigger: Reason for the alteration
- User: What user was responsible for the alteration
- Related Subject: A related item to the alteration, for example, an order or a return
- Created at: The creation date of the alteration
Replenishment
- Purchase Inventory Level: Defines when new inventory should be purchased
- Desired Inventory Level: Defines the desired level of inventory
- Replenishment: The lifetime of the product (never out of stock, Discontinued, etc).
Backorder/Preorder
Backorder
- Backorder Allowed: Whether backorders are allowed
- Max Qty to Backorder: How many products can be back-ordered
- Backorders Datetime: Time to back order
Pre-order
- Preorder Allowed: Whether pre-orders are allowed
- MAX Qty to pre-order: How many products can be pre-ordered
- Pre-Orders Datetime: Time to pre-order
Inventory Level Log
The number of inventory movements can grow rapidly. The Inventory Level Log gives a view of all this data.
- Navigate to Products → Inventory → Inventory → Click on a product. By clicking on a product in the overview, a product inventory ‘view’ page will open. In the top right click on “Inventory Level Log” button. On this page you find the following information:
- Inventory Alteration: Alterations to the quantity of the product in the inventory
- Allocated Inventory: Alterations to the quantity of product allocation in the inventory
- Warehouse: Warehouse in which alteration occurred
- Trigger: Reason for the alteration
- User: What user was responsible for the alteration
- Related Subject: A related item to the alteration, for example, an order or a return
- Created at: The creation date of the alteration
Change Product Inventory Levels
An inventory level is a combination of a product and a location (warehouse) that holds inventory.
- Navigate to Products → Inventory → Inventory → Click on a product. By clicking on a product in the overview, a product inventory ‘view’ page will open.
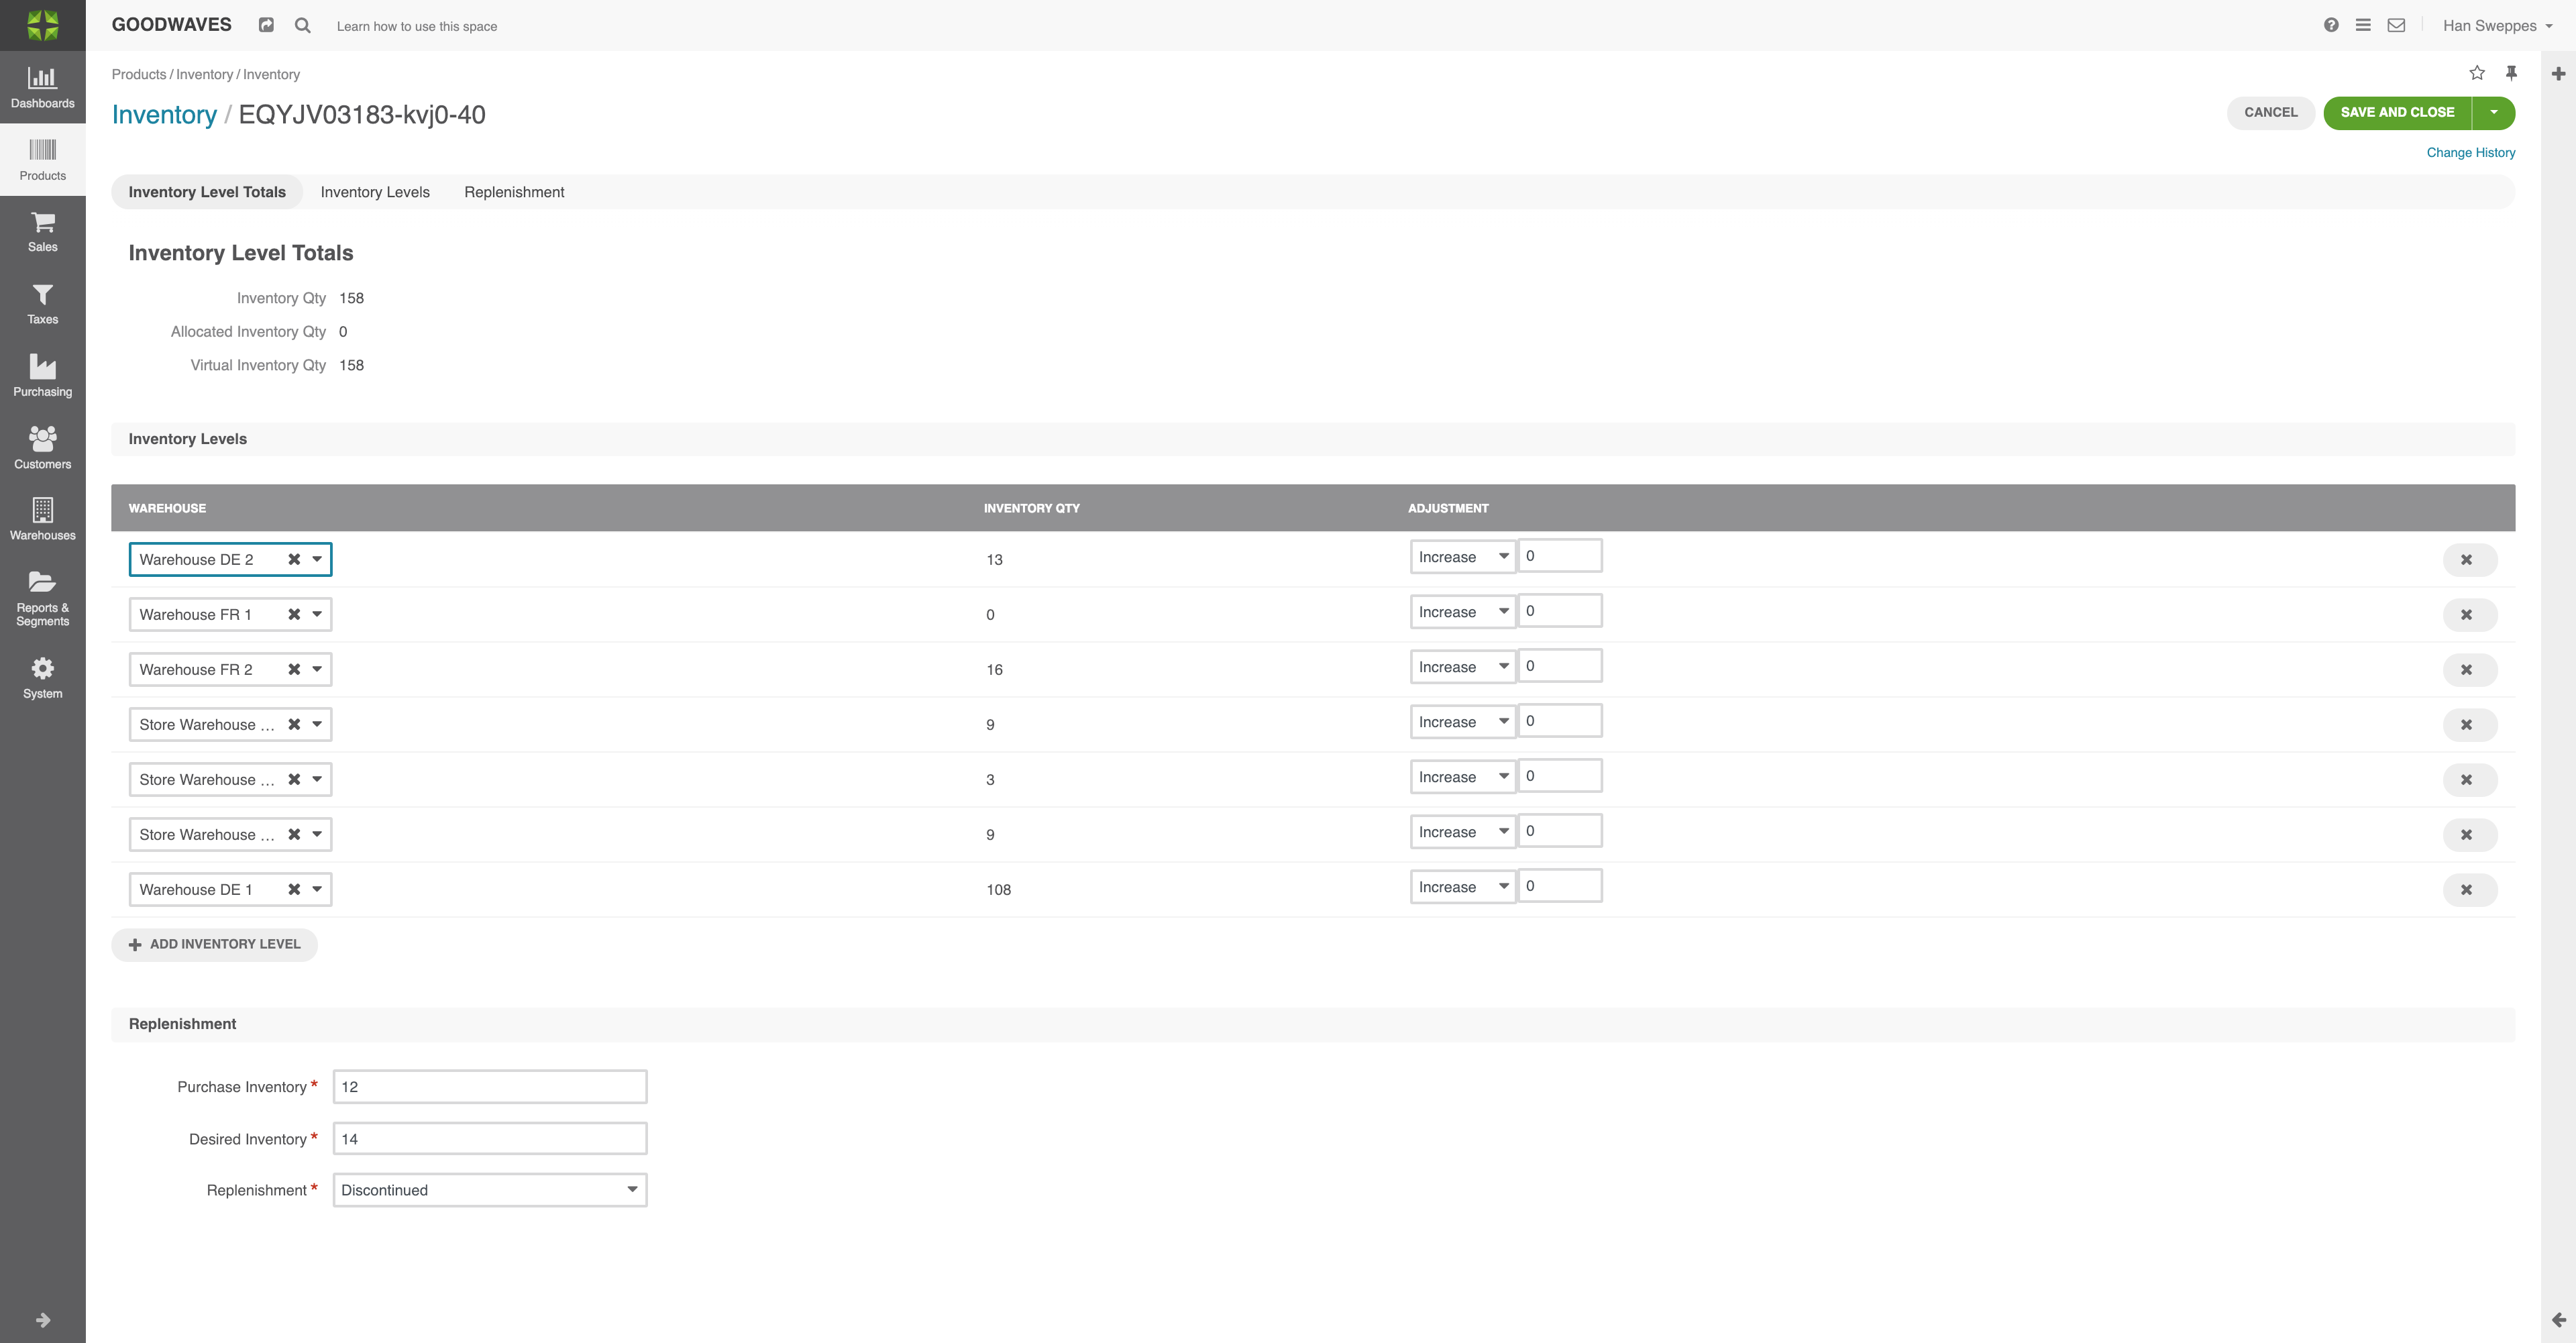
2. Click on the ”Edit” button in the top right of the screen.
3. Fill in the following details:
- Warehouse: The warehouse that holds the product inventory
- Pick location: Location where the product is located
- Inventory Quantity: Shows the amount of physically present inventory of a product
- Adjustment: The amount of product inventory that needs to be increased or decreased
- Remove: Remove the warehouse that holds the product inventory. Note that any stock assigned to this warehouse will be lost
4. Click Save and Close
Replenishment
- Purchase Inventory: Defines when new inventory should be purchased
- Desired Inventory: Defines the level to which the inventory should be topped
- Replenishment: Default strategy for replenishment
Import/Export Inventory Items
Easily add large numbers of product inventory at once, by importing inventory levels.
- Navigate to Products → Inventory → Inventory
- Click on the “Export” or “Import file” button in the top right of the page
- Export: click export products to export a list of all the items in your inventory
- Import: download a data template, fill the spreadsheet with the appropriate data, validate your data and import the file