Definition of Returns
Return Management is a part of the process where customers are returning a product in order to receive a refund, replacement, or repair during the product’s warranty period.
Returned merchandise requires management after the return, for the product may have a second life cycle after the return. Returns can be registered in Marello, to make sure items are available for sale again as soon as possible.
All Returns overview
Here you will find an overview of all returns.
- Navigate to Sales → Returns

- Return Number: Unique number assigned to the return
- Order Number: Unique number assigned to the original order
- Quantity Returned: Quantity of returned items
Quanitity Ordered: Quantity of originally ordered items- Created at: When return was created
- Updated at: When return was last updated
- Step: What step in the Return process/workflow the return is in
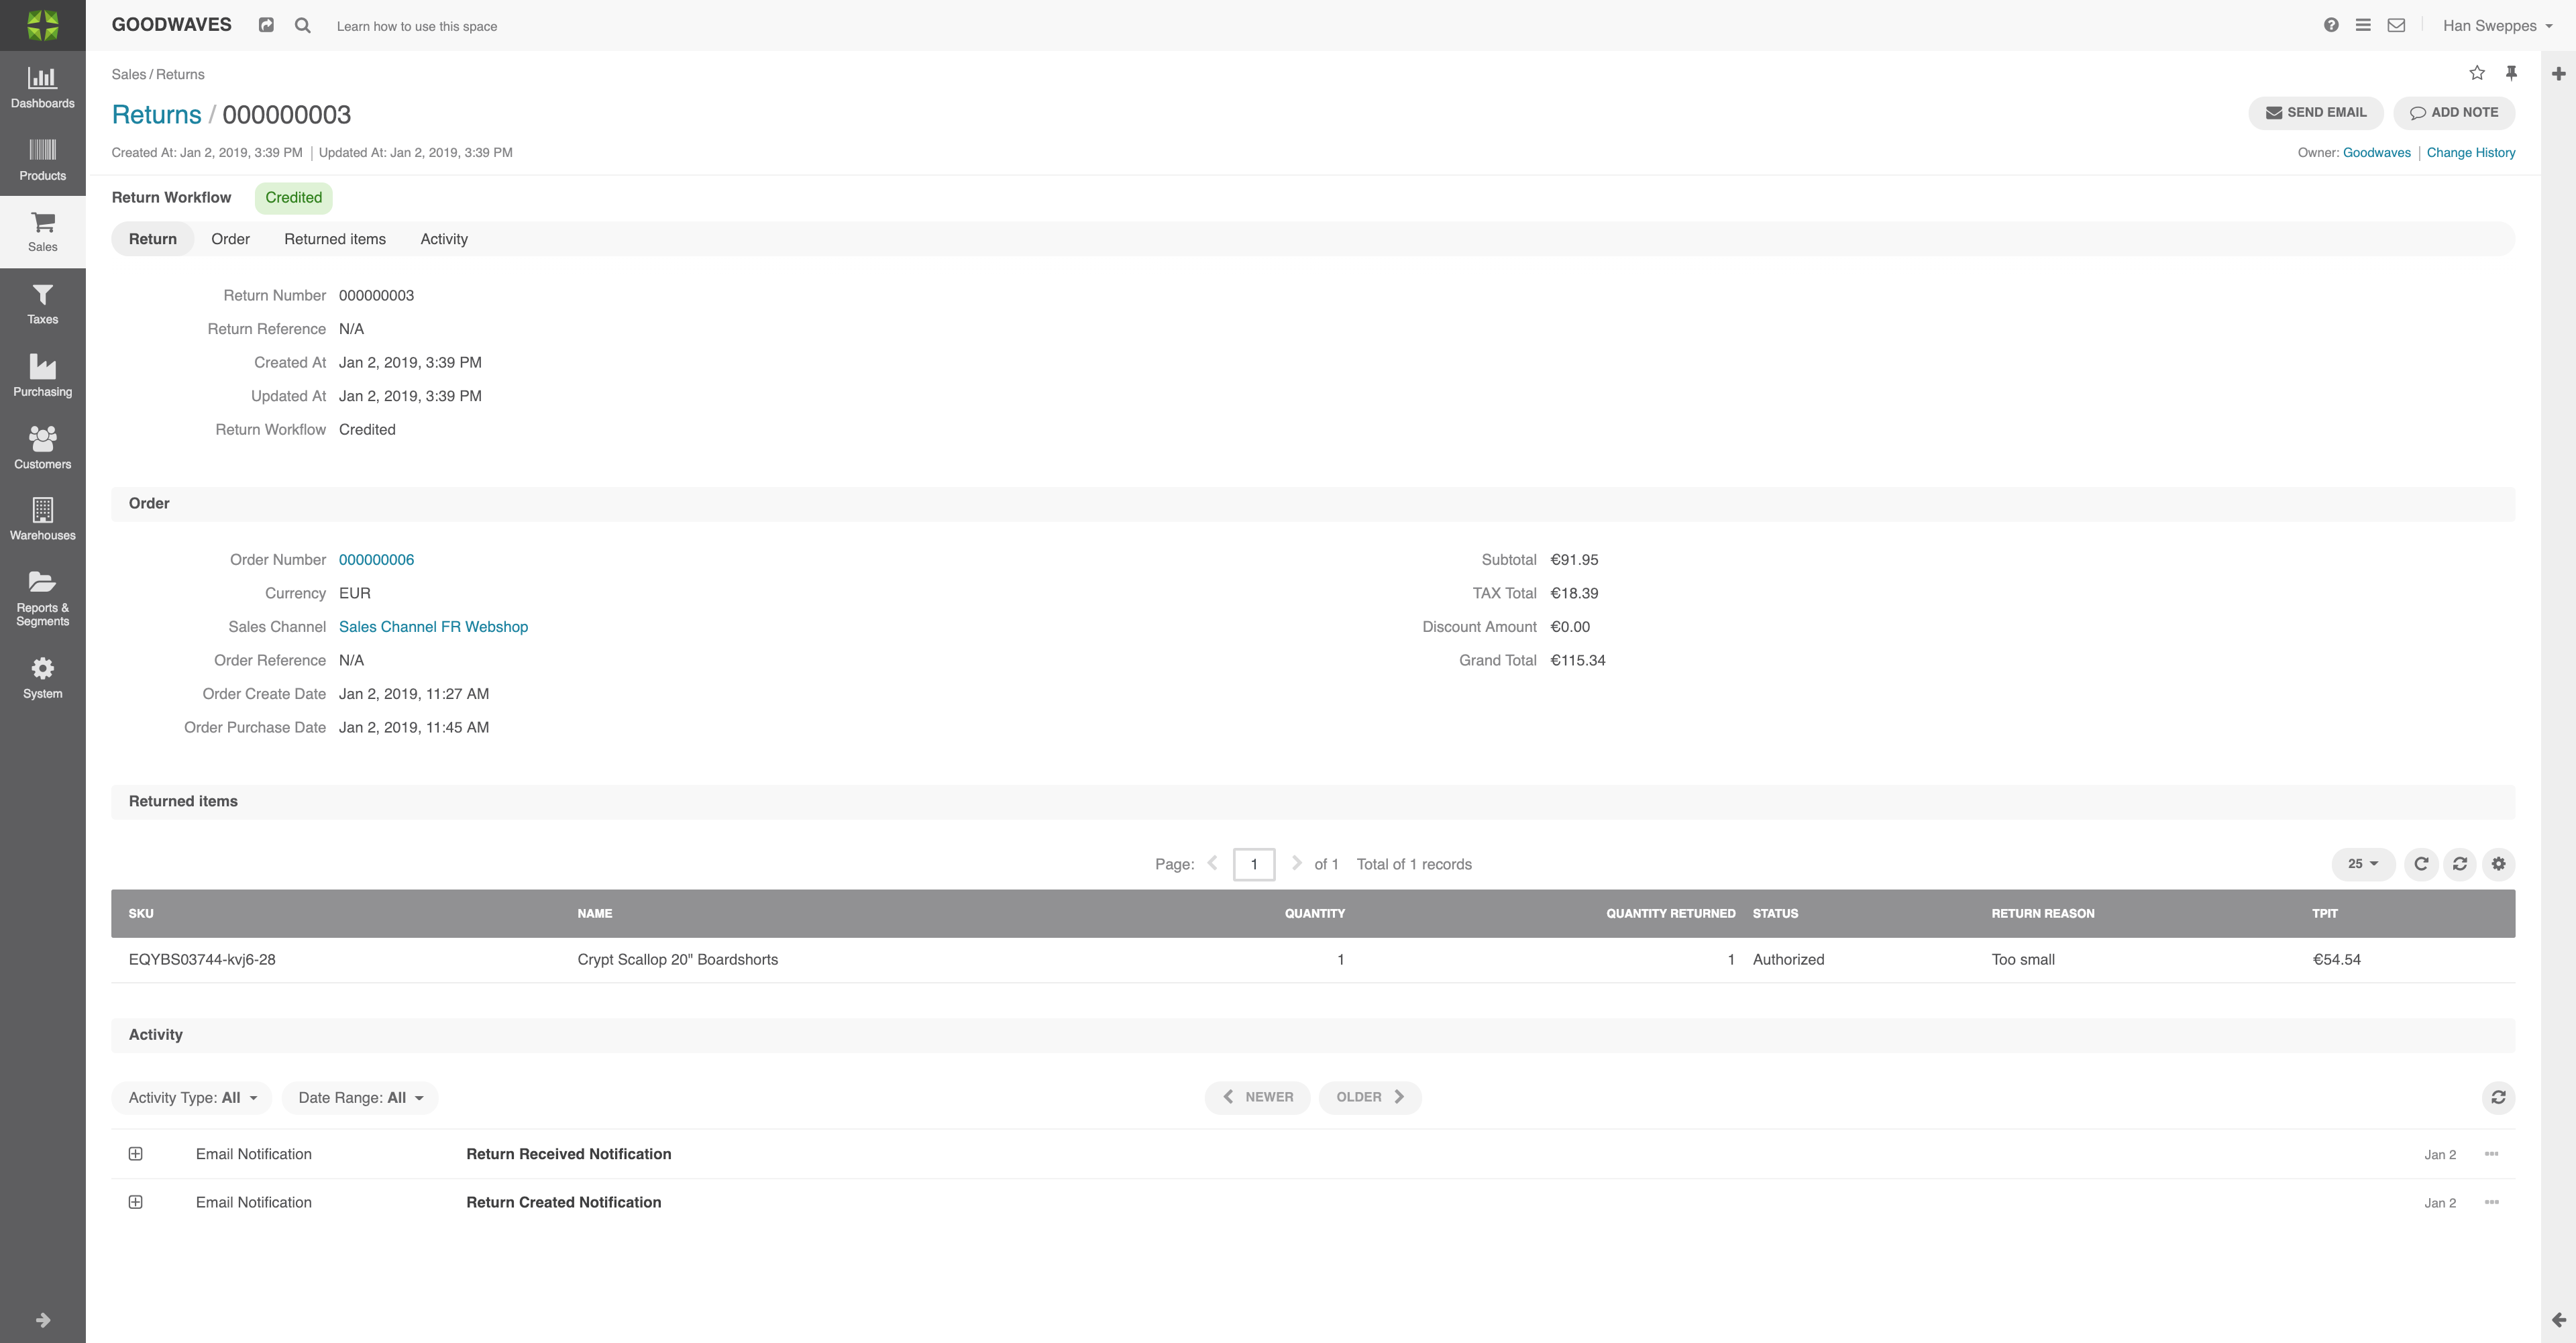
Individual Return Details
Every return has their own return details.
- In the menu, navigate to Sales → Returns → Click on one of the returns.

Return
- Return Number: Unique number assigned to the return
- Return Reference: Extra return information
- Created At: Date
- Updated At: Date
- Return Workflow: What step in the Return process/workflow the return is in
Order
- Order Number: Unique number assigned to the original order
- Currency: Used currency
- Sales Channel: In which sales channel the product was originally bought
- Order Reference: Extra order reference
- Order Create Date: Date of order created in Marello
- Order Purchase Date: Date of the original placed order
- Subtotal: Subtotal of the original order
- TAX Total: Tax total of the original order
- Discount Amount: The discount amount of the original order
- Shipping Costs Incl. Tax: Shipping costs including tax
- Grand Total: Grand Total of the original order
Returned Items
- SKU: SKU of
returned product - Name: Name of the returned product
- Quantity ordered: Quantity of the original order
- Quantity returned: Quantity of returned items
- Status: Status of product in process/workflow
- Return Reason: Reason for the return
- TPIT
: Total Price Including Tax
Activi ty
- Email Notifications: Emails sent out to the customer
How to register a Return
Depending on the workflow, the return flow can be customized to individual needs. As an example, we describe the default return workflow.
- To register a return navigate to Sales → Orders. Find the order that will be returned in the list of orders.
- Click on the order. In the top right corner, click ”Create Return”.

Order
- Order Number: Unique number assigned to the original order
- Currency: Used currency
- Sales Channel: In which sales channel the product was originally bought
- Order Reference: Extra order reference
- Order Create Date: Date order was created in Marello
- Order Purchase Date: Date of the original order placement
- Subtotal: Subtotal of the original order
- TAX Total: Tax Total of the original order
- Discount Amount: The discount amount of the original order
- Grand Total: Grand Total of the original order
General
- Sales Channel: What sales channel an item is returned in
Ordered Items
- SKU: SKU of the returned product:
- Product: Name of the product
- Quantity Ordered: Quantity of the original order
- Quantity Returned: Quantity of already returned items
- Return Quantity: Quantity of newly returned items
- Status: Status in the workflow
- Return Reason: Reason for the return
3. Check if the right sales channel is selected
4. Add the number of returned items in ”Return Quantity”
5. Add a predefined return reason in ”Return Reason”
6. When you finished filling in the return information, click ”Save and Close” in the top right of the page.
7. Navigate to Sales → Returns. You will find your newly created return at the top of the Return Overview.
8. Additionally, the returns workflow will make sure you can register received returns, verify its contents, and refund the customer.
Working with the Returns Workflow
When a return is created, a workflow can be used to record individual steps.
Depending on the predefined workflow, there will be buttons in the top right of the page. In this case, we used the default settings.
- Navigate to Sales → Returns and click on the return you want to create a refund for. Here, the workflow starts.
- When a return is requested, the return will be entered into the system. In the top right of the page, you will see buttons.

3. When the returned products are received, click on ”Return Received”.
4. Now, you can verify the contents. Did you receive the products that were in the original return request? Click ”Contents Verified”. Otherwise, click ”Contents not Verified”.
5. Inspect the contents. Are the products eligible for a refund? Click ”Credit (Inspection OK)”. Otherwise, click ”Inspection not OK”.
6. When the inspection was OK a refund will be created.
